
5 Easy No-sew DIY T-Shirt Modifications for a More Feminine Fit

I love a graphic t-shirt, but as a petite curvy woman, they don't always love me. Most graphic t-shirts have a “unisex” fit, which has a high crew neckline and long, snug sleeves that aren't really my jam. If you're also searching for tees that actually fit before you start modifying, here are the best t-shirts for grown women, based on Wardrobe Oxygen reader picks.
Over the years I have mastered a super easy no-sew, no measure, no tools needed except a decent pair of scissors way to cut my t-shirts for a more feminine fit. Below are my favorite no-sew DIY T-shirt modifications. And once you've got the fit sorted, this post on how to prevent pinholes in t-shirts will help you keep them looking good longer.
No-Sew DIY T-Shirt Modifications for a More Feminine Fit
My sewing machine is covered with dust and most of my scissors have been hijacked by my kid for school and Girl Scout crafts. Even so, I usually modify every unisex t-shirt I get with at least one of these two steps below. Super easy and quick, yet quite effective in making a straight-cut t-shirt more feminine or work better with curves.
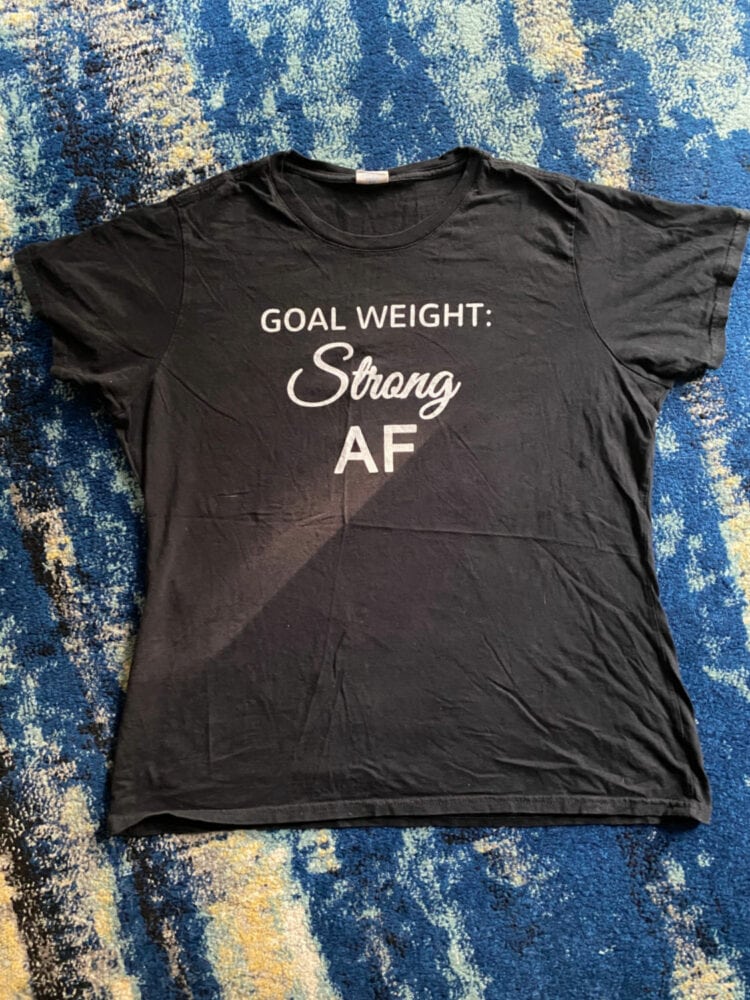
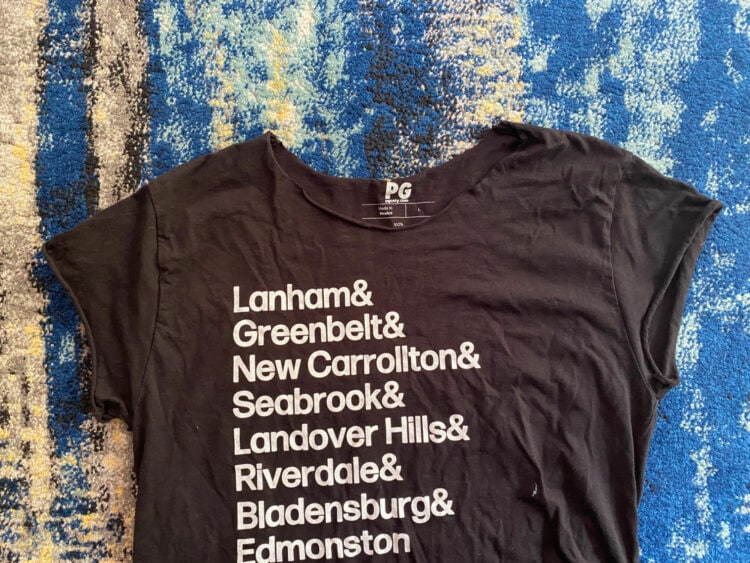
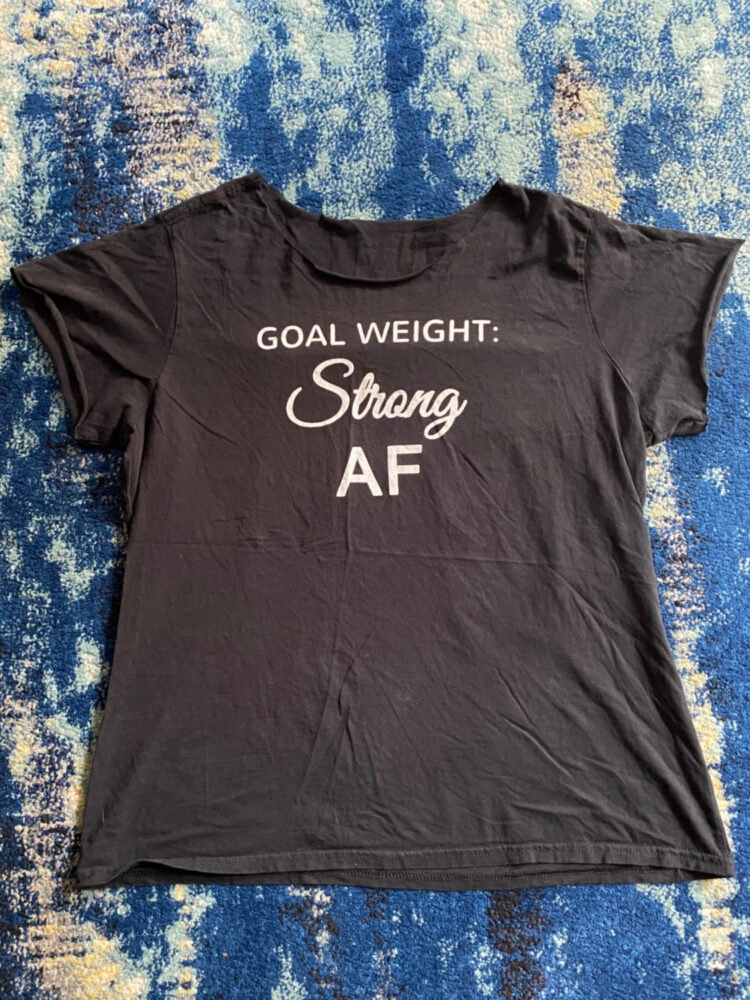
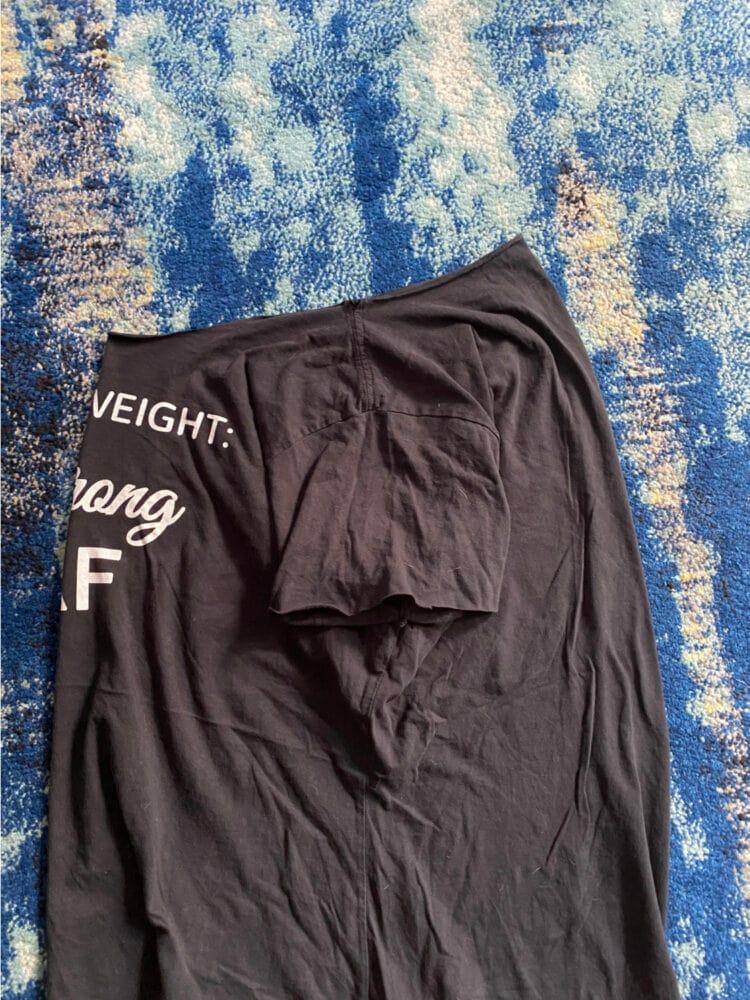
I am going to show how I do these easy DIY t-shirt modifications with a favorite t-shirt of mine. Clearly, I've worn it a lot, and now want to give it a new life with a new more feminine fit and silhouette.
1. Shorten the Sleeves
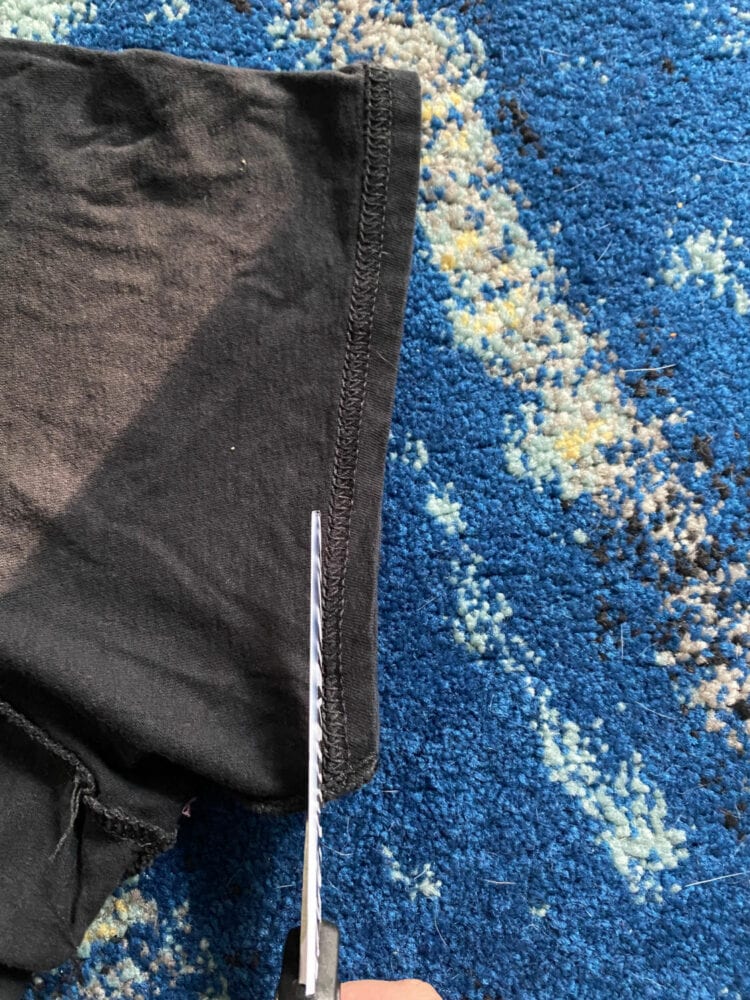
The easiest and quickest way to improve the fit of a t-shirt is to shorten the sleeves. I am 5'3″ and whether I have been a size 10 or a size 16, I find just cutting off sleeves right above the hem gives just the bit of lift and softness I desire.
No need to be precious, but you will have a better time using fabric shears instead of that sticky rusty pair of scissors in your junk drawer that also open shrink-wrapped packaging and cardboard boxes. Hide them from your family so they are only used for fabric.
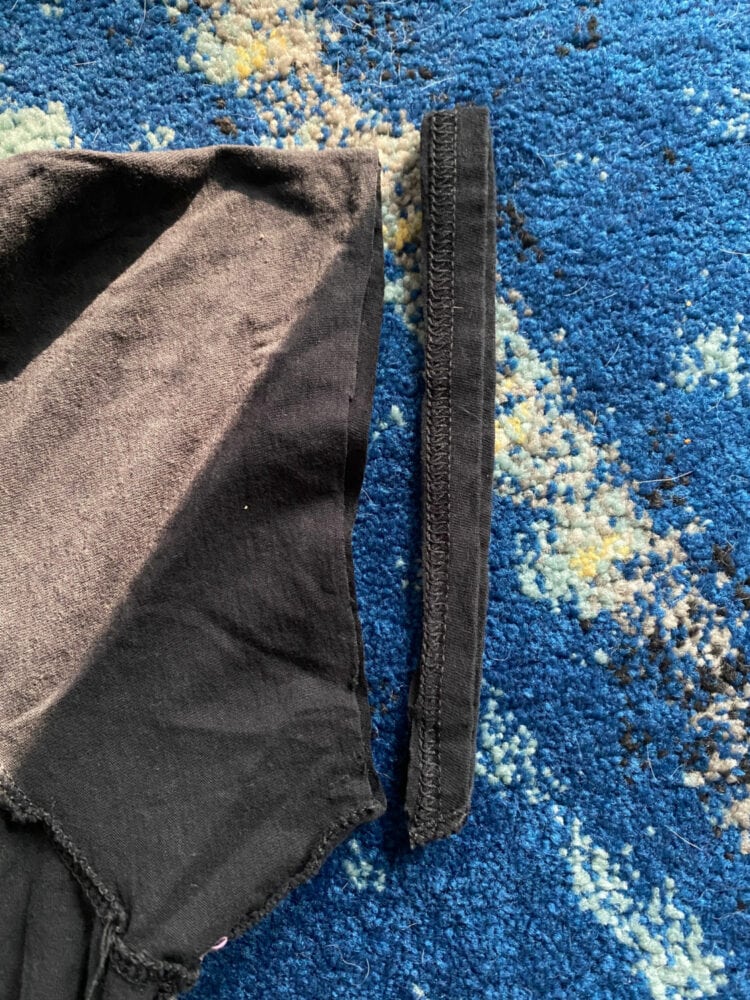
Snip right along the edge, and when finished, give a little tug and gently stretch the sleeve so the unfinished edge curls. There is no need to finish the edge; it won't fray. I have shirts decades old I've done this to and the sleeves haven't frayed, the seams haven't unraveled, they still look great.
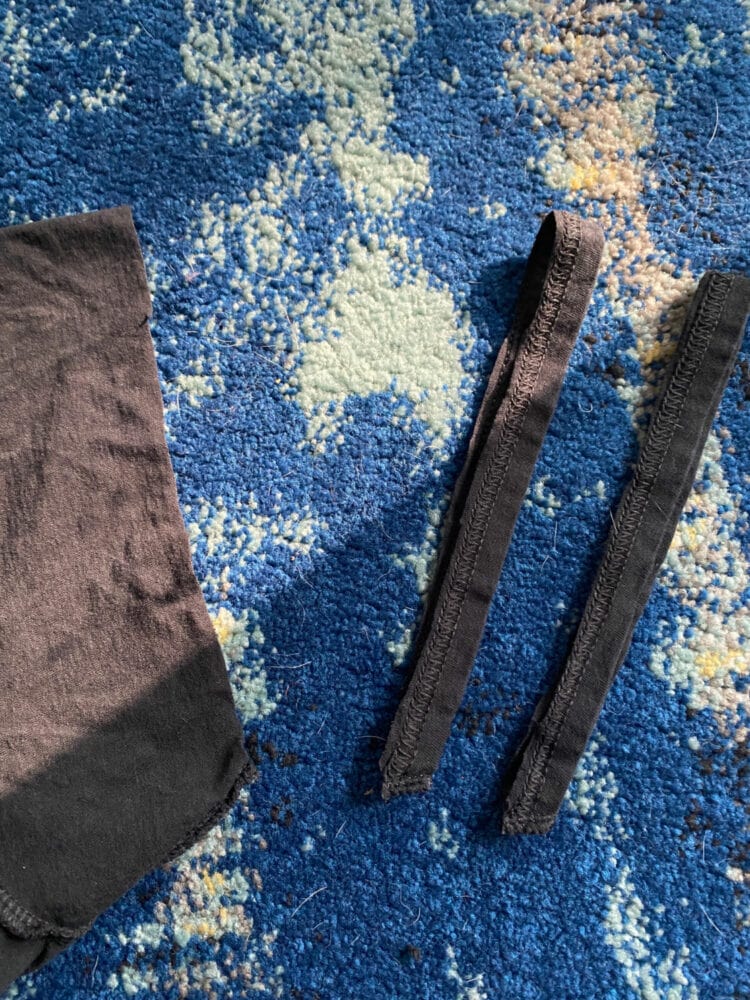
A perk is that little loop of fabric that was the original hem makes for a good headband! Even my big noggin finds them comfortable and good for workouts!
If you're rethinking your whole casual wardrobe while you're at it, here's how I'd style these modified tees: Graphic Tees at Work: Stylish Ways to Wear Them Professionally.
2. Modify the Neckline (Remove the Neckband)
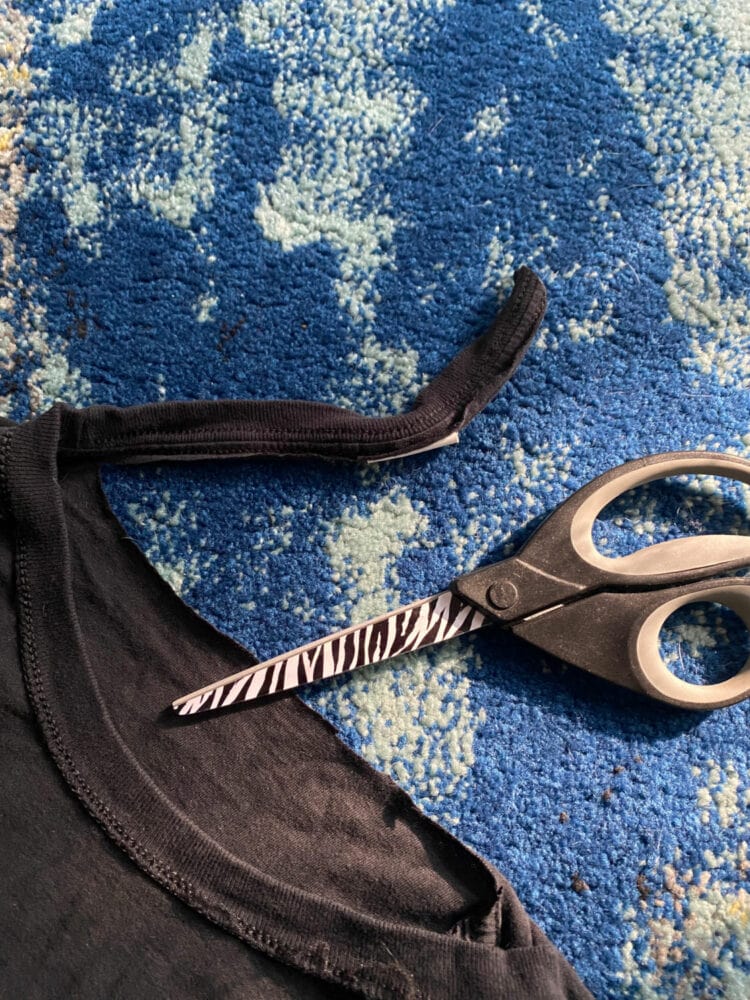
First step for some is the only step needed to modify a t-shirt's neckline: do exactly what you did with the sleeves. Turn the t-shirt inside out and cut along the neck band, removing it (this will also remove the tag). This simple modification will instantly open the neckline while still covering bra straps.
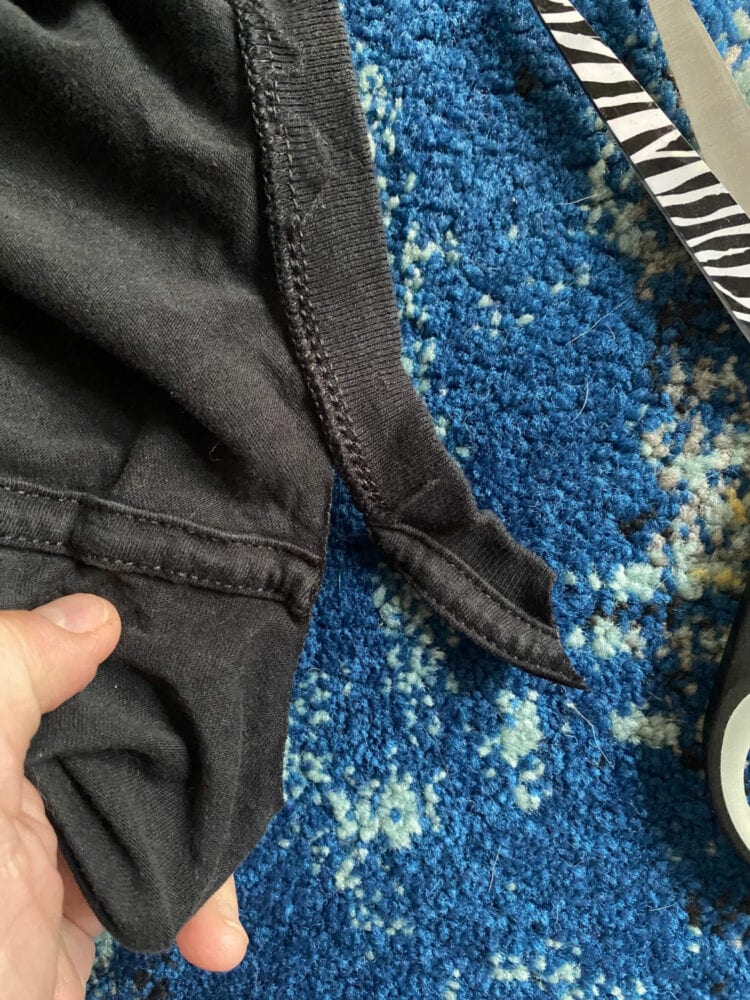
At the crossover shoulder to neck seams, cut across it, using the ribbed neckband and not the seaming as your guide. I promise these seams will not unravel even with multiple trips through the washer and dryer. When you have removed the neckband, again give the opening a bit of a tug so the edges curl under. Snip off any points that are jagged and obvious (often, the shoulder seams will stick up) and tug again.
Put on the shirt with any undergarments you would wear with it. Check yourself out in the mirror. Wish the neckline was a bit more open/boatneck? Wish it would scoop lower in the front or back? Think more of a v-neckline would be better? You can do this and more… but you need to go slow, take off slivers at a time, keep the shirt rightside out (so you are always aware of the location of the graphic), tug to curl after each snip, and try on again after each snip.
3. Open/Reshape the Neckline Further
I usually desire a bit more of a scoop in the front. To do that, I have the shirt right side out and match up the shoulder seams so the “front” of the shirt is the sleeve, not the graphic. Then, with a tailor's marking pencil, a bit of bar soap, or even the more crumbly sidewalk chalk, I'll draw a little smaller than what I think will be the right angle.
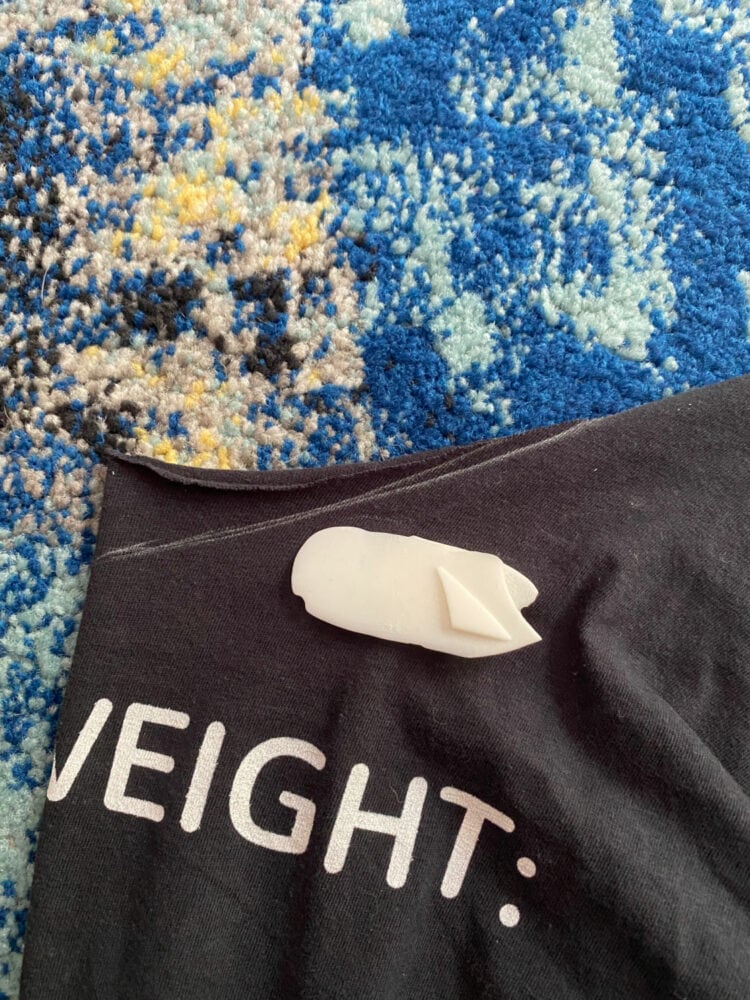
Note I said angle, not width. Imagine you're cutting the thinnest of slices of a pie. It will be thicker at the crust, and get thinner until it makes a point at the center of the whole pie. You may be drawing a line 1/4″ from the center of the neckline but you'll angle it getting thinner and thinner until it ends, likely an inch or so before the shoulder seam. Cut on the outside of your mark so nothing is left on the t-shirt. Tug to roll, try on again.
If you want your shirt off the shoulder, I have had more success with cutting another “pie” off the back of the shirt and tugging and trying it on before cutting wider into the shoulders. Try this first, but be conservative as we are all shaped differently and what works for me may not work for you.
Before you trim again, tug it a bit more; t-shirts are super stretchy without their seams and you very well may not need to do anything more to get what you desire. In fact, if you're unsure wash your shirt before going further. Frustration and uncertainty have destroyed many a t-shirt.
4. Shorten the Hem (or Remove It)
Like sleeves and necklines, a cut hem of a t-shirt will roll, and unless you're just trimming off the hem, cropping it, tying it, or tucking it in, this can look messy (and can roll more, especially if the shirt is fitted over the stomach). However, some standard-issue t-shirts for jobs, teams, fun runs, and family reunions can end up looking like dresses without some modification.
To ensure this is done evenly, I press my t-shirt so it is as smooth as possible, and use straight pins to have the front and back stay together. Use a ruler to draw dots with a tailor's pencil, chalk, or soap the specific amount you want off (remember to be conservative because the shirt WILL roll up), and then use the ruler to connect the dots. Cut with the t-shirt against a table or flat surface. Do NOT tug to roll when finished, you want it to roll as little as possible.
If your shirt is a bit too snug, try trimming off just the hem of the shirt. Use the same process I used for the sleeves. just removing the hem will loosen the shirt, and a couple of tugs here and there can make a meh shirt look and feel wow. The hem will roll, but if the shirt isn't so snug and you haven't shortened it a lot, it shouldn't roll up too much.
5. Make It Sleeveless
Learn from me, you can't just cut off a shirt's sleeves and think it will look cute. This is better with a shirt 1-3 sizes large and knowing you'll want to wear a cami or cute bralette underneath because it will gape.
Just like with the neckline, cut right along the shoulder seam, removing the seam along with your sleeve. Again, I do not recommend tugging to roll; it will do it on its own a bit but you don't want to encourage it or make the arm openings any wider.
I do like cutting out the neck of a t-shirt, cutting off 2-4″ of the hem, and then the sleeves for a cute top to wear with a sports bra for working out and outdoor activities. This can also make for a cute layer over a dress or jumpsuit.
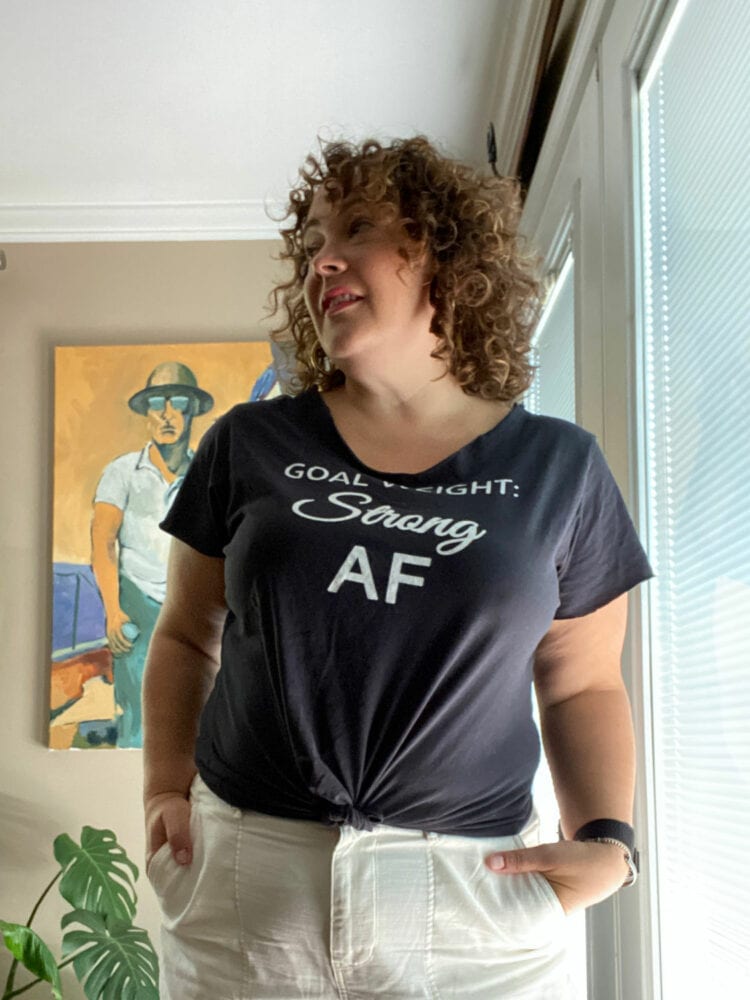
Bonus Tip: Knot It Without the Weird Bump
I know you know what I'm talking about. You grab your shirt's hem and loop it around itself to knot it. It looks great… except for that appendage sticking out. This video shows how I knot my t-shirts by creating two “tails” and tying them in a knot. After laundering, the shirt goes back to its original shape.
This works especially well on shirts where the hem is cut off; if you know you will be wearing your t-shirt in such a manner every time you may wish to just snip off the bottom hem to get more stretch for a t-shirt knot.
If you plan on always wearing your shirt knotted, slice the shirt from the center of the front bottom hem up about 3″ and tie! For visuals, see the second bulleted video from Vintage or Tacky that I link below.
Final Tips and More T-Shirt DIYs

I am very conservative with cutting my t-shirts for a more feminine shape because I have been burned in the past. Nothing worse than snipping too much off a t-shirt you love and make it something you hate. Don't be afraid to just cut off the sleeves and/or neckband and sit with that for a while. Wash it, tug it, get to know it before you go further.
Consider taking a t-shirt you don't love, or one you thrifted or scored from Freecycle or your local Buy Nothing group to test out these methods before going to town on your beloved band tee. Who knows, that meh shirt may DIY into your favorite top! Not sure how to style what you already own? Here's my tips about building a capsule wardrobe from what you have before buying anything new.
Cut your t-shirt in a well-lit room and try on in a well-lit room with a clean mirror. If you're using scissors that also cut plastic, paper, etc. prep them by cutting folded-up aluminum foil; this will clean and sharpen them a bit. Do not modify your favorite t-shirt while under the influence of drugs, alcohol, heartbreak, or TikTok.
More T-Shirt Modification Tutorials:
If you're looking for ways to get supa dupa creative with your t-shirts, here are some fun tutorials I found:
- BlueprintDIY: Five ways to upcycle t-shirts for the impatient beginner (YouTube)
- Vintage or Tacky: My friend Cora shows how she easily DIYs a plus size band t-shirt (YouTube)
- Shabby Creek Cottage: How to make a t-shirt bigger (great if the shirt you love only comes in smaller sizes; sewing skill required) (Shabby Creek Cottage Blog)

FAQ
Will cutting my t-shirt cause it to fray or unravel?
Nope! T-shirt fabric (both 100% cotton and blends) doesn't fray when cut. The raw edges will actually curl under naturally, especially after a little tug and a trip through the wash. I have shirts I've modified over a decade ago that still look great.
Do I need special tools or sewing skills for these modifications?
No sewing required… keeping this easy peasy! The only thing worth investing in is a decent pair of fabric shears. Using dull scissors that have also been cutting cardboard and crafts will make the job harder and the cuts messier. A good pair of fabric scissors runs under $10 and makes a big difference.
How much should I cut off at once?
Less than you think. Seriously, go slow and cut conservatively. T-shirt fabric is stretchy and will relax and curl after you cut it, so what looks like “not enough” often ends up being just right. Try it on after each snip and stretch before going further. You can always cut more; you can't un-cut.
Can I make a t-shirt sleeveless with this method?
Yes, but size up before you try it! Cutting off the sleeves entirely works better on a shirt that's 1–3 sizes larger than your usual fit, and you'll want to plan for a cami or bralette underneath since the armhole will gape. Cut right along the shoulder seam and let the edge roll naturally; tugging can make the armhole wider.
Will the modifications survive washing and drying?
Absolutely. I've been doing this for years and throw my modified tees right in the washer and dryer without any issues. The cut edges don't unravel, and the rolled hems stay put. I recommend untying any knots before laundering; this will also help the shirt go back to its original shape.
What's the best t-shirt to practice on first?
Don't start with your favorite band tee! Grab something thifted, a freebie tee from a fun run, or a Buy Nothing score. Once you've got the hang of the technique, then you can tackle the shirts you actually love.
Do you have any no-sew DIY t-shirt modifications I didn't cover that you love? Please share them in the comments! This post was originally published in 2021, but I updated it for 2026 due to recent interest!

Did you like what you just read?
Consider tapping here to buy me a coffee in thanks. The best gift you can give a content creator is the gift of sharing. Consider sharing this article on Facebook, Threads, or saving on Pinterest. Thank you so much for your support!
Love what you're reading? Add Wardrobe Oxygen as a Google Preferred Source so you see more posts like this in your search results.


This isn’t no-sew, but I have repaired pin-holes and moth holes on tops and sweaters, with a mix of embroidery and appliqué.
Have knitted striped patches to wittily repair the elbows of a favourite sweater.
Pieces cut off a t-shirt can repair the heels of favourite socks !
My husband’s shorts now have several small amusing labels, taken from other garments – a tiny flag for example – sewn over rips and wear holes . . .you would never know they weren’t there originally !
Right, off to chop off a t-shirt hem !
Thanks !
Helen
I love this Helen! Thank you for sharing!
Thanks so much! I am NOT a crafty or skilled person and this was super easy to do. Love how the Tshirt looks now! 🙂
Made the first prototype and am quite happy with it. I was unable to wait for the sewing machine, had to also widen the hem. Here are some observations that apply specifically the style I want, your mileage may vary:
– Being cautious so that you don’t cut too much is good advice, but if you like really wide neckline, you’ll probably end up cutting quite a lot more than suggested. Perhaps after some experiments you can know what you want and how to get there, so there’s no longer need for such caution.
– You can get a nice shape for the sleeves by cutting basically diagonally, keeping the upper side longer and cutting the bottom very short.
– If you like crusty punk vibes, messy cutting with dull scissors is just fine.
– A nice way to widen the hem is to vertically cut the sides (you can go quite high towards the armpits). Sewing a triangle there is one way, but the cut-off neckband and sleeve hems can be cut into pieces of different lengths that are used to connect the sides of the cuts (longest at the bottom, shorter towards the armpit). Perfect if you like to expose a bit of the love handles.
– Sewing by hand takes so long! If you have no sewing machine, at least for a prototype using a stapler is a surprisingly good option. It’s quick and fixing mistakes is easy. Depending on the design, they might neither be visible nor scratch your skin. However, if you like a sort of industrial-but-still-homemade look, them being visible is not a problem. I’m not sure if this solution works long term, though.
– If you want to restore worn (simple) graphics or even do some upgrades, acrylic paint works just fine, although colors specifically for clothing graphics should be available too.
Ooh, quite useful! As a fat transfem nerd, I have a bunch of graphic tees that have been unused for years since I decided to start dressing femininely. Just today I finally went through the bags of them and divided them to those I want to upcycle and those that will be spare parts. My plan for the hemlines is basically the opposite; as I want the slightly dress-like look, I’m thinking of making them a bit longer and wider. However, that must wait until I get the used mini sewing machine I ordered. In the meantime I can start experimenting with the sleeves and the necklines. Without these instructions my approach would’ve been more complicated and yet probably still worse. So, thank you!
So glad I remembered this post! Just cut the hem, cuffs, and neck band off a sweatshirt and it’s going to be wearable now, compared to the original. Just in time to show team spirit at tonight’s season opener of our local minor league baseball team!
Awesome! I am so glad to be a useful resource!
As a pg county girl living in Montana, I NEED THAT MD CITIES TSHIRT!
Isn’t it awesome? I love https://pgcnty.com/ it’s a fun brand to follow on Instagram too with all the throwback content!
Thank you so much for this! I was able to greatly improve the look of a boxy crew neck tee I had to wear for work today. I was a lot more comfortable and confident after the adjustments!
You are fantastic!! Thank you for the clear, precise instructions for all of the tips you presented. You articulated it well, and anyone of any age can follow along with ease and confidence.
Great tutorial. Any tips to reduce the width of the body of the T-shirt please?
I haven’t found a good one yet, unfortunately.
You can always do the cut and tie the sides…it’s very 80s/90s, but it’ll tighten up with the width for sure. Maybe not what you’re looking for, but figured I’d share.
There are lots of tutorials online on how to do this.
Thank you so much! Really simple and makes a t-shirt so much more flattering!
25 years ago (before they made made feminine versions of NHL team shirts) I customized a children’s-sized mesh hockey jersey into a cool, one shouldered shirt – so…not regular T-shirt material – a bit more structured.
I:
-cut a diagonal from the left shoulder/neck intersection to the right sleeve/torso intersection to make a 1 shouldered shirt
-I extracted the original neckline from the scraps, opened it up into strips and sewed it across the front of the new neckline to give the shirt a finished look
-I opened the right torso seam, added grommets down the right (now open) side and laced it to fit with a hockey skate shoelace.
This looked great – purposeful, unique and properly sized on me.
So simple, this is exactly what I was looking for, thanks!
This is GREAT! I am tall and thin and rarely find a t shirt that fits. Also, music festivals usually only sell men’s t-shirts that are huge on me and not feminine. Can’t wait to get scissoring. Thx again for this wonderful tutorial!
Have you ever cut a tshirt made from 50% Cotton / 50% Polyester? How do the edges do? Do they stretch and “curl” like 100% Cotton does? What about after washing? Do they look okay? Thanks for any input!
Good question! I have found that they work similarly. If it ends up being a thinner fabric it doesn’t always curl as much but it doesn’t fray, even after washing.
thanks for this – I’ve always cut the necks of men’s t’s but always SEWED them and never realized that wasn’t necessary. Just tweaked 2 T’s that had been sitting in the “to do” pile for a year! Also really excited to try the “make a T larger” tip from the other blogger…planning to try it on a T-shirt from the Cavern Club in Liverpool that I had given up on (literally rescued it out of the donation bag this morning, hours before the truck arrived to take the bag). Excited to finally wear it without losing 40 pounds. . . british “Large” is not US “Large” haha!
Great advice. I was too impulsive and aggressive with a sorority reunion tee shirt in the hotel room 10 years ago. Now I see where I went wrong and feel fortified to try on another.
I know this is an old article but I have a question. I have a ton of sweatshirts with hoods and I am not really a fan of hooded sweatshirts. Will the hack for sweatshirts work of they have a hood? I don’t want to ruin them if it’s not going to work the same. Love all the tshirt hacks BTW!
I’ll be honest I haven’t done it with a hoodie. And looking online I didn’t find a lot of tutorials for hoodies. I’d recommend trying with one you don’t love to test. If it works please report back!
Great tips! Especially this one: “Do not modify your favorite t-shirt while under the influence of drugs, alcohol, heartbreak, or TikTok.”
Inspired me to create this handy formula:
+ ✂️ + ( // / ⏰) =
Do you recommend sizing up for the best look after cutting sleeves and collar?
I don’t, in fact I think removing these pieces makes the shirt a more relaxed fit.
I think I commented on the original post, but am too lazy to scroll through to find it, LOL. This is still such great info. I wanted to add that, as a tall woman, I always have to buy men’s sweatshirts — I hate the masculinity of the cut, so I buy them extra large, cut off the entirety of the sleeve cuff, the bottom hem, and the neck ribbing, and voila, I have a perfect sweatshirt. If I’m feeling bold, I make vertical cuts up the side seams to make “side slits.” So easy and totally transformative.
Also, I really love the current rolled/raw hem or fringed hem on some clothing. You can do this yourself with most fabrics. Denim, for example, can be frayed by unhemming the original seam. Yay for modifying clothing!
PS. What a difference a year or two makes. Your photo of the sleeve ends, your “headbands,” were what I first used to make a COVID mask at home, back when we couldn’t get anything and we thought the pandemic would be over in a few months.
Fantastic post! I wish I was a rock chick who felt OK with raw hemlines – Alison makes them look so good. Raw hemlines will hold up fine over the long term on good-quality cotton knit.
If you are used to sewing using a sewing machine, you’re OK with sewing knits, and you DO want to sew a t-shirt to alter it…here are two easy adjustments.
I admit, the first one is lazy! This will give 3/4 to 1 inch of adjustment. This method is best for fine or light t-shirts, such as light rayon knits or slub cottons/linens, and for t-shirts with straight hemlines.
1. Fold up the cuff or bottom hem.
2. Pin it.
3. Stitch the folded cuff/hem into place with a stretch stitch.
I will also sometimes narrow the sides of a t-shirt with a shallow curve. I do this from about 2 inches below the bust to 2 inches above the hem. Like Alison recommends, I press and pin. This gives a blocky shirt better side shaping if you’re a busty hourglass, like me. Even a tiny curve or a half inch of narrowing makes a surprising difference.
Twice in my life I’ve looked at a really desirable cotton t-shirt and… taken it to my tailor! Yes, I asked a tailor to adjust a t-shirt. Once, she completely reshaped an oversized men’s t-shirt on me. It went from a blocky sack to relaxed/cool. Another time, she took the ribbing off a neckline, halved it cleverly, and used to create a deeper neckline with a narrower edge – just amazing. This was not cheap tailoring, but I’m still wearing both those t-shirts to this day.
Wow, great tips Sadie! Thank you!
I love this hack. I’m a bigger girl and really tall too. So regular women’s tops just don’t look very good on me in my opinion. So I’m normally stuck wearing men’s tees and I HATE the way they look on me. They just look so masculine that I can’t hardly stand to even look in the mirror.
I’m going to be using this hack to make all my tops look better…I hope. I’m going to practice on an older one first.
Thank you for posting this video!!
I know this is an old post, but I wanted to say thank you for your clear and helpful instructions! Such great and easy tips. Also, your curls are poppin! So pretty.
Thank you!
Great tutorial, thanks! FYI, the Blueprint link URL goes to this post, not to the video as you intended.
Oh wow thank you for that heads up! Link fixed! For everyone the video from Blueprint DIY is https://youtu.be/h7iVt6LK_S4
Any special tips for cutting hoods off hoodies?
I was amazed how much more comfortable a tee is when the neck is just a bit wider than crew neck. I have a sweatshirt from 1998 (it’s crazy now to have items that are over 20 years old when I couldn’t even go a week without losing/destroying something when I was younger) that I can’t bear to part with but I’m tired of it. I think I might alter the neckline!
I’m suddenly feeling inspired. Great tips!
I used your instructions, Allie. It made a great difference in a T-shirt I wear to Tai Chi. I love it!
Good hunting, Alison! Thanks!
But shoppers should read the reviews carefully before purchasing. Evidently the quality has changed, making newer shears harder to use. Mine are old and work perfectly. One reviewer recommended looking on e-bay instead.
Thank you for this! I got the US Riley in the mystery box and the neckline is really funky and too high. This might make it wearable!
And I fixed my Riley and now I love it! While I was there I also had a go at three graphic Ts that were unisex and they are alos much better.
So thank you …..
Yay I am so glad!
I asked for more feminine not cut up and old looking!
Thank you for this helpful post. I was gifted some men’s graphic tees that I just don’t wear because they look too masculine. Looking forward to (carefully) trying this out!
Good luck!
This is a brilliant post! I too, love graphic tees but don’t like how they fit. I think I’ll thrift a couple and try this. Great suggestions, thank you again!
My pleasure, I hope it helps!
These are great ideas for the blah crewneck t-shirt that I always look terrible in! I don’t often wear statement t-s, but I’ll take a couple old ones and try these suggestions out.
I’m glad you found this post beneficial!
Brilliant! Thanks for the step by step!
My pleasure, Ann!
So glad you included a sweatshirt, too! I’m tall and like the length of men’s sweatshirts, however, the sleeves are always too long and the neck too tight. I cut the sleeves off right above the hem binding, make slits up the sides, and cut out the neck. No raveling, easy to do, and looks great. As you said, tiny snips are the way to go — I’ve ruined a few along the way.
What I meant: Make slits up both sides of the sweatshirt, from the hem upwards for a few inches, to allow for hips and for ease while sitting.
Bette, what a great addition to Alison’s examples. Thanks!
Brilliant, thank you so much for these tips, Bette!
Bette, would love to see examples before I attack a new sweatshirt. Can you share pics?
Ooooh! I have a fave tee that the crew neck is all stretched out (much like that “bacon” neck commercial ) that I can’t wait to cut later today! Thank you for the inspiration and know-how!
This is GREAT for bacon neck shirts, I’ve done it myself!
This is a great post! I have so many t-shirts that don’t fit that I going to try your tricks on-it will be so much fun! Thanks for such easy to steps. Loya
Thank you Loya, hope it helps you love your t-shirts more!
>>Do not modify your favorite t-shirt while under the influence of drugs, alcohol, heartbreak, or TikTok.
LMAO! So true!
I love Fiskars — thanks for reminding me I need a new pair. I always tie a bit of fabric around one of the handles to let my family know these are the cloth scissors ONLY. Everyone knows to stay away!
That’s what my mom did with her orange Fiskars!
For those of you with family members not deterred by reminders, a combination lock through the handle makes my sewing shears my sewing shears
OMG you’re my hero!!
Great tutorial. Looking for a shirt to try this on.
Glad you liked it!
For lefties, Fiskars also make left-handed shears. Worth hunting for so you don’t get pain and grooves on your thumb from using right-handed shears. (I hear bewildered righties saying “Oh, that’s a thing?” Yes, my children, it is.)
This fellow lefty feels your pain!
When I was in high school, making my own clothes and struggling with the righty shears at school, my home ec teacher advised my mother to get me a pair of left-handed shears. They were harder to find then. On my next birthday, that was my present. I used them until they fell apart.
Woo-hoo, Amazon has left-handed Fiskars for less than $10! https://amzn.to/3mhOi5s thanks for bringing this up!