
Tools for an Online Life: How I Make Graphics and Edit Photos in PicMonkey

I recently had two encounters where individuals I knew in real life could benefit from my knowledge from over these 18 years of blogging. This happens often; when folks understand what I do for a living they often suggest we get together for a drink or lunch or coffee to “pick my brain.” And I love this, but as someone who hardly has the time to help herself, I don't have time to help all these other people. But if I write it all down, I not only can help these folks, I can also help others including possibly you.
Tools for an Online Life: How I Make Graphics and Edit Photos in PicMonkey
Introducing a new series: Tools for an Online Life where I will share things I know that could help a range of individuals. For some, this information is unnecessary, for others it will seem elementary. But my hope is by sharing these tools and how I use them, it can help those who are spending more time online, either personally or for a job, volunteer project, or community.
Today I am going to go over PicMonkey, the web-based tool I use to edit my photos and create most of the graphics and collages for my blog and social media. This is also the tool I use to create graphics, collages, and printables for my family and organizations I support. Please note, this is not a free tool but it's under $100/year for more than you can get from pretty much any other tool even three times this price.
This isn't sponsored, it's just one of the darn patootin' most useful tools I have in my blogger arsenal and the easiest to use. I like that PicMonkey is web-based so I can use it on any device and I can have others in my organization use my account from their computers.

PicMonkey has an app; I do not use that app. This article is about the PicMonkey website and how I use it on my laptop computer. PicMonkey is free to play with, but you will need to pay to download any creation or use all of its features. You can find pricing at this link.
How I Use PicMonkey as a Blogger
I've been blogging since 2005. I never took a course, never had guidance, I essentially learned how to do this job by seeing what my peers did and Googling answers to my questions. I found PicMonkey pretty early on in its existence; I know it was started in 2012 so maybe I've been with them a full decade. I was working on my blog a bit at home, a bit at work, and I didn't have access to Adobe. PicMoney was the solution I was looking for.
PicMonkey began as a web-based photo editing tool. It was clunky and lacked many of the tools of Photoshop, but it was so intuitive that I could edit my outfits on my work computer while consuming my lunch and Gchatting with a friend. It helped me reduce shine on my face when I was sweating, fixed a dent in my hair, made a zit disappear, while also compressing my images to a size that sped up my photo-heavy website.
Over time, PicMonkey has grown and changed. Now it is my absolute favorite place not just for photo editing but creating graphics. PicMonkey was free for a long time, then it was cheap, now it's $72 a year for their basic plan but if you are a small business, this is a valid business expense and will be one of the best investments you can make.
In fact, after using PicMonkey for a while if you love it, you, like me, may want to upgrade to the Pro plan ($120/year) where you can upload your brand logos, fonts, and hex colors to always have available your branding and also be able to save your designs as PDFs for easy printing and sharing.
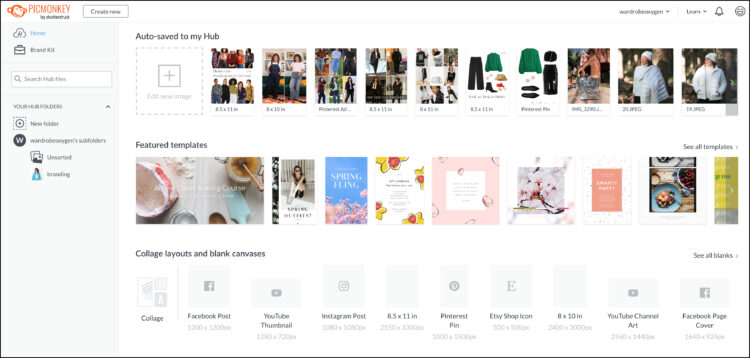
I am a solopreneur and save all my designs in my cloud storage, so I may use PicMonkey differently from others. I also use it as a blogger which means I create all my designs on a computer, not a mobile device. I press the plus button and decide what I am going to work on: upload a photo from my desktop, create a collage, or start with a blank canvas.
How I Edit Photos in PicMonkey
After 18 years of blogging, I still edit my photos in PicMonkey. I occasionally use Adobe Lightroom to play with color and lighting, but nine times out of ten, I only use PicMonkey to edit photos for my blog and social media because it's so intuitive and accessible on any device.
In this tutorial, I use captions on each image to provide more clarity. Captions are not always easy to read on a mobile device; you can usually increase font in your web browser. You may find that beneficial if you are using this as a tutorial via your phone.
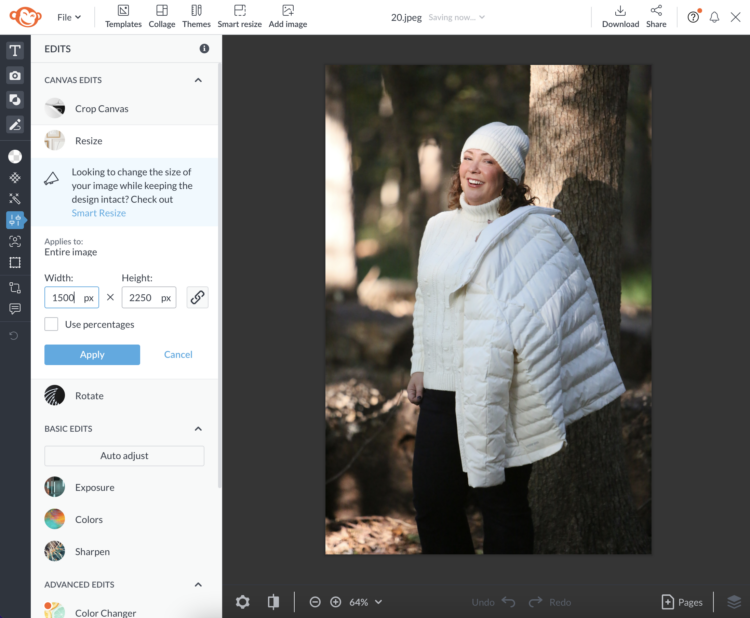
For photos, you will have a black skinny sidebar and a white wider one. The white one displays the features available from whatever you pressed on the black sidebar. It will auto-open to Edits. If you're not looking to brighten or darken or color correct your image, you still want this tab to crop and adjust the size of your image, just that it may be the last tab you use. I will share its benefits at the end.
Removing an Image's Background in PicMonkey (and adding a new one)
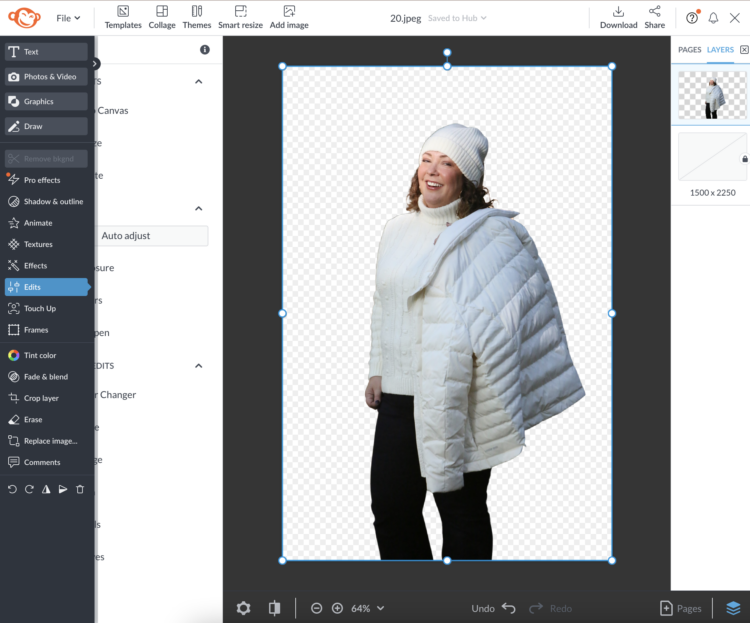
The scissor tool in the black sidebar makes a background disappear. This is cool for a lot of reasons, and it will save as a PNG meaning that the disappeared background will be clear and you can then use that image overlayed on other photos or graphics. Feel free to save this to have for later and then keep editing further.
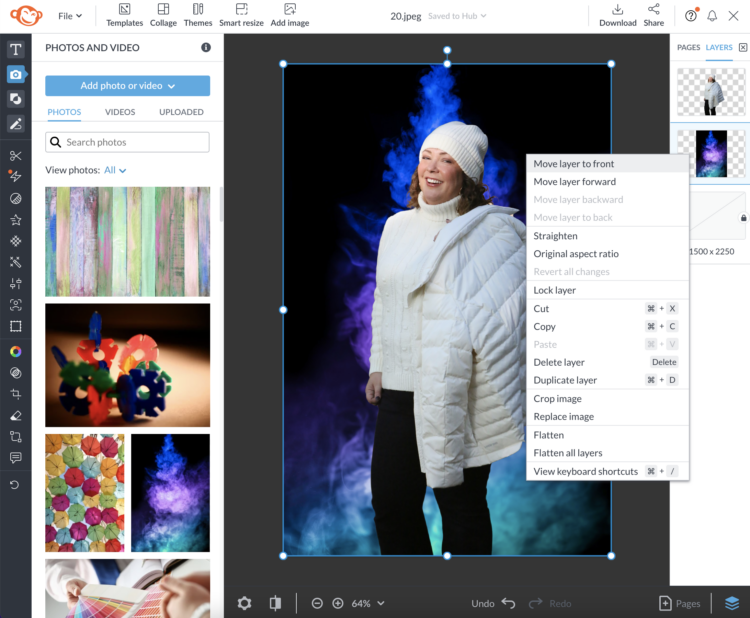
Layering Images in PicMonkey
You can then upload another image or use one of the royalty-free images available with your PicMonkey subscription and place it in the background. It will cover your initial image, but if you right click you can choose send to back and it will be your new background. Toggle between your layers with the white sidebar on the right that will pop up once layers exist in your image.
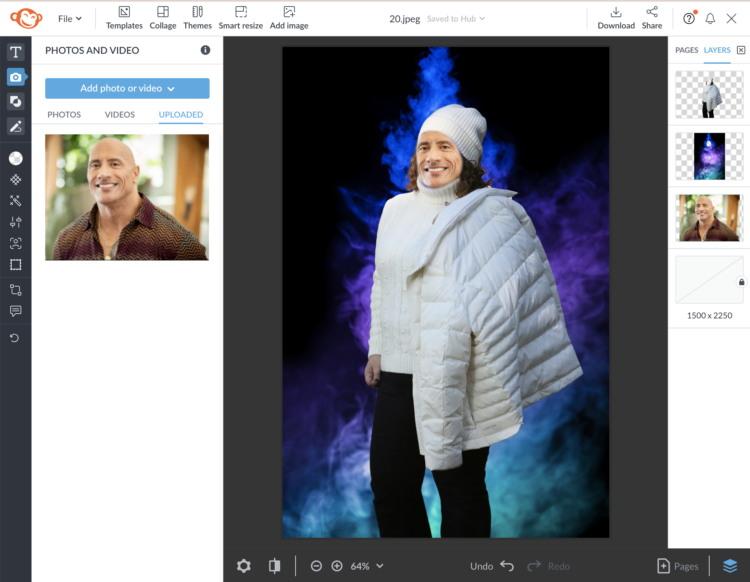
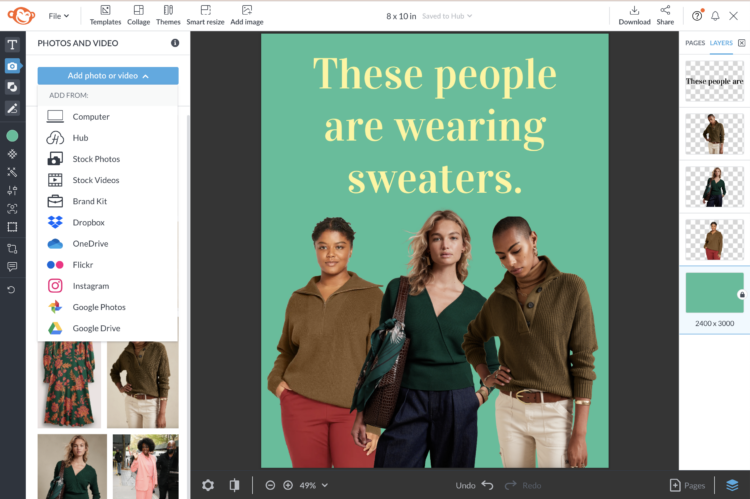
The Erase tool is one a lot of folks desire to remove things that didn't disappear from the Remove Background tool, or for things like here where I became The Rock. I did this by uploading a picture of The Rock, resizing it and setting it to be the back layer so it peeked out looking fabulous in Lands' End.

“Photoshopping” Images in PicMonkey
The Touch Up taskbar is often what folks are looking for the most. This is where you will have tools to brighten your smile, add highlights to your hair, blush to your cheeks, and modify the shape of most anything. This is an extremely dangerous taskbar as these tools are often obvious to others, but since you're editing the photo you may not realize how obvious an edit you have made. That's what I did here.
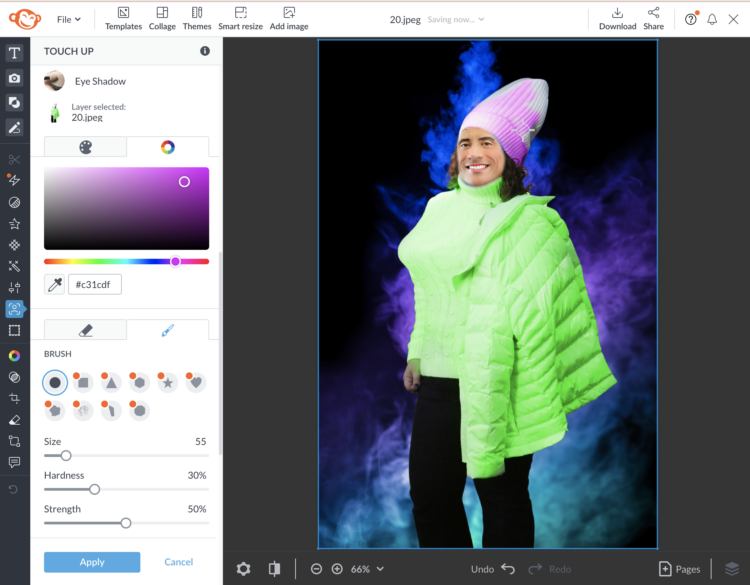
But these tools can be used beyond their description. In each color-changing tool (blush, eyeshadow, etc.) there are the typical colors desired but then a color wheel tab where you can play and choose any color. That's how I made my (or should I say The Rock's) sweater pink and hat green. It takes a delicate hand (which I didn't have here hence some of my hair and hand are tinted) but you can get that fancy in PicMonkey.
Removing Errors with the PicMonkey Cloning Tool
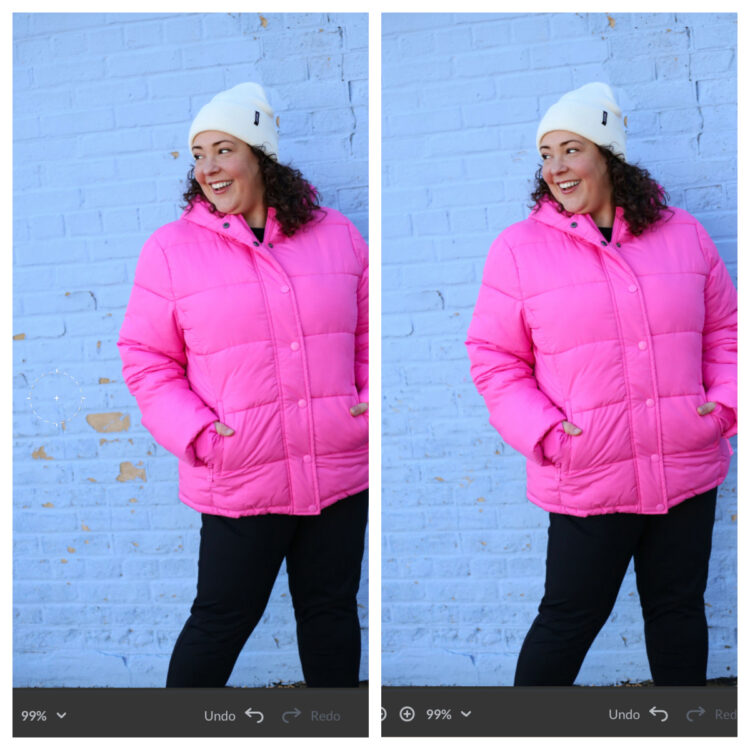
The Clone tool is very useful when you want to make something disappear. For example in this photo, I cloned painted part of the brick wall to cover chipped patches. This also takes a delicate hand; I don't recommend trying something this major though cloning is great for removing trash off the sidewalk, cat hair on a sweater, or bird poop on siding.
Adding Text to Images in PicMonkey
You can also add text and graphics. You can upload a PNG/transparent image as another layer (or with the Pro version, upload a JPG and remove the background), you can add a box (I use the square graphic and adjust the size, shape, color, and transparency to put behind text). Once you're finished you can download your image.
Tips for Sizing and Saving Images for Websites and Social Media
You never want to upload full-size images to a website. For websites, a really big image can slow down a site. A slow site isn't fun to visit and folks in 2022 aren't willing to wait to watch something load. Google also dings slow sites so that site is less likely to show up when someone is searching online for what that site contains.
Also, a full-size high resolution image is appealing to those who use images without permission. There are far too many stories of folks who had their blog or Facebook photos stolen and used on billboards, in ads, on other sites, and in compromising situations. Compressing and reducing the size of your images makes them less appealing to steal.
After doing all your cropping and editing I'd do at least 1200 px wide if going on a blog or website. Google prefers images at this size. If on Facebook, you can go smaller since it's being viewed on smaller devices but I don't usually go below 800 px and I do higher if it's a graphic/infographic. Size doesn't matter as much for Pinterest or Instagram; higher res will look better when loaded but the platform doesn't permit the images to be downloaded at that size.
When you save as a JPG, you have three quality choices. I do high for Instagram, but do medium or low (depending on the kind of image and how big it is) for the quality when I save. This won't leave it grainy when seen the way you desire, but if someone tries to crop or blow it up, the quality will be lost. And it will make your site faster.
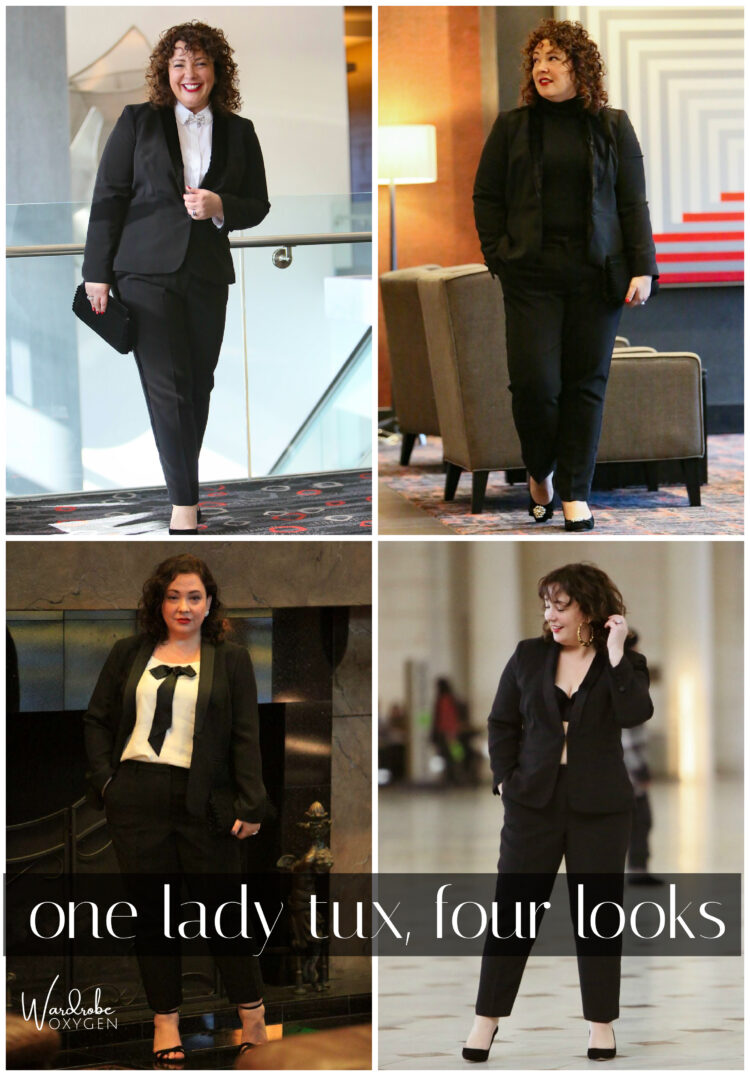
How I Create Collages in PicMonkey
I make collages for my blog and LTK in PicMonkey in two ways – with their collage tools and with their blank canvas. The collage tool is the easiest and the one you've seen me use the most over the years.
Creating Collages for Pinterest and Facebook
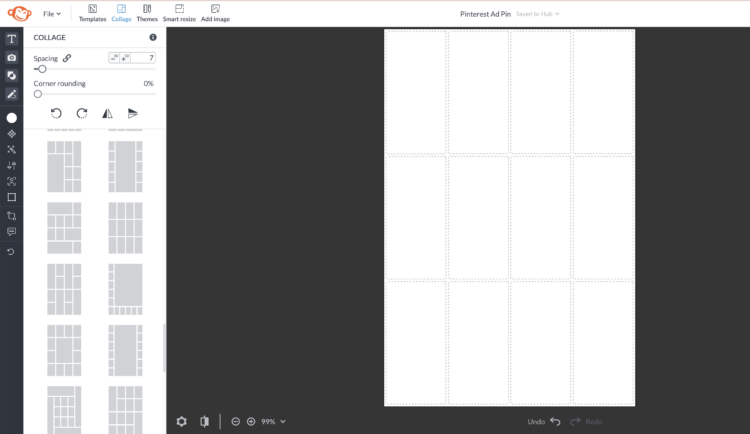
PicMonkey has all the standard sizes for social media and printing, plus you can create your own size. Wanting to create a blog graphic? Consider the Pinterest-sized graphic for something not too big and will make for a nice-sized vertical image. Making images for Facebook? They have the latest measurements for what will fit best.
I picked Pinterest pin (they have different names but most have the same measurements). Then you can choose the layout you desire. I'm usually doing 9 or 12 evenly spaced boxes. You can also change the width of the space between graphics, and what color you want that space to be (even transparent).
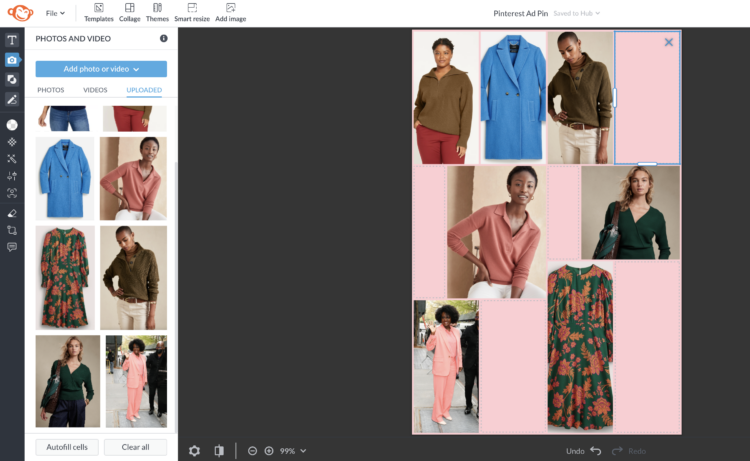
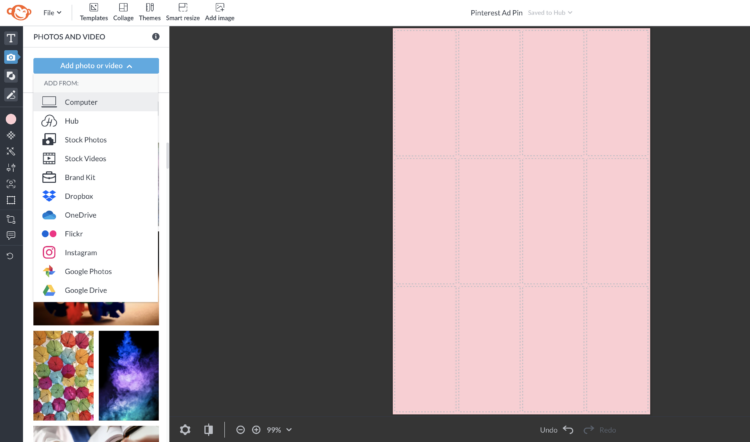
Then hit the photo icon and upload your photos. You can still adjust any aspect of your collage. You can “autofill” the images or drag to place in the cell of your choice. You can drag the edges of the containers to adjust the height and width of cells, columns, and rows. You can even hover over cells and click the “X” and delete them or drag an image between two cells and create a new cell. And there's the arrow at the bottom of PicMonkey to back up if you change your mind.
Creating Collages for Websites and LTK
The other type of collages I do is by choosing a blank canvas. Since I share my collages on LTK, I usually choose 8X10 which fits well on there but still looks good on Pinterest, and can also fit in a carousel on Instagram and show well on Facebook. For most platforms, vertical is better than horizontal or even square because they look great on mobile devices.
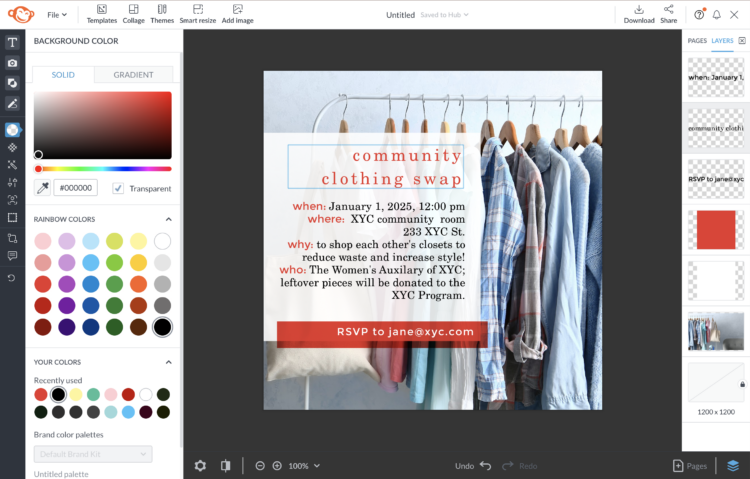
Here you can change the background color again, to whatever color they offer or use the color wheel to add a specific hex color or find one on the wheel. You can do gradients, you can get creative. As a fashion/style content creator I've found simple is best to let the contents of the collage shine.
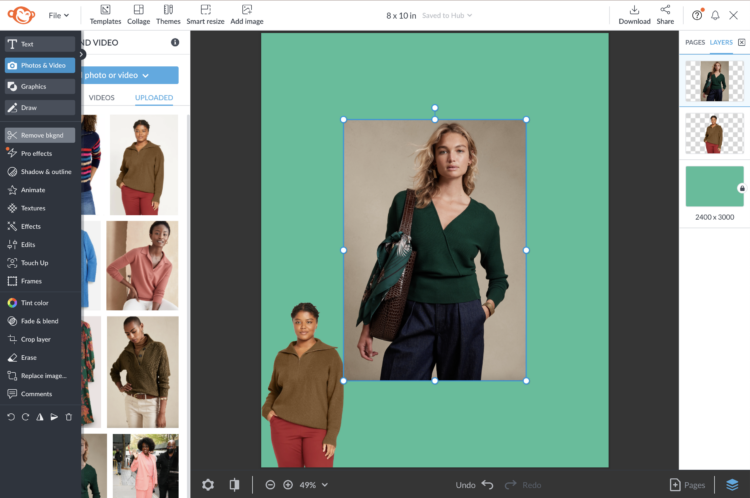
Then upload your images. Click and uploaded image, it will drop to the center of your canvas. Click the scissor tool to remove background, use the Erase tool if there is leftover background you want gone, and then resize and move to where you think you may want it to reside.
I keep doing this until I have all my images, moving them around like puzzle pieces, right-clicking to move back or front, until it looks the way I desire. Then you can add text, playing with fonts and colors. PicMonkey has built-in guidelines to help you line up and center aspects of your graphic.
Again, if you're sharing on a website, I recommend keeping the image smaller and lower quality. If you want folks to share the graphic, make it a higher resolution but don't forget to brand it. Whether you have a PNG/transparent logo you can layer on it or you just add a name or website, you will be glad when your graphic is being shared beyond your audience.
How I Create Graphics in PicMonkey
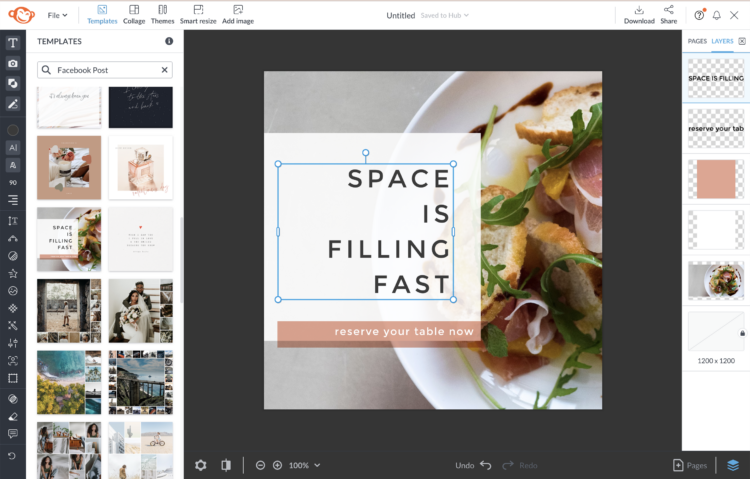
PicMonkey has a bunch of templates to help you get started. Don't be afraid to use them; they're on trend and easily customizable. Featured templates will be on the home page but you can click to see all the templates and then if you click in the search field for “Search All Templates” a menu will show the most popular purposes/sizes.
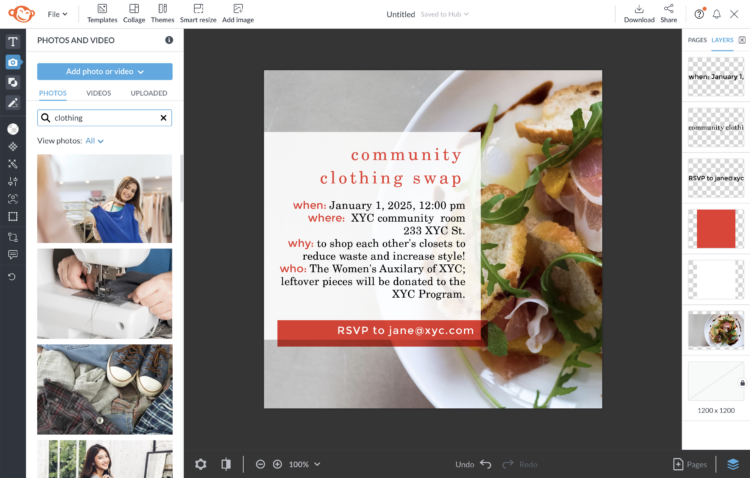
Once you found a template that has a general concept you like, you can start playing. Here I changed fonts, changed size, color. I added a text field and within that field I highlighted certain words to change font and color. You can change the images by searching Photos or uploading your own. If your first search term doesn't work, get more detailed.
If you want to edit an image in your graphic, make sure it is a separate layer (unlock any locks on the image in your layer taskbar). One feature I use a lot is on the Edit taskbar where I will go to Rotate, and then flip to get a mirror image that may fit my graphic better. You can change the graphic size, move it, and get it to fit best.
Creating a Brand Kit in PicMonkey
If you are a small business or working for a nonprofit or small business, you likely have a brand kit you're working from. Specific fonts, hex colors, logos, and other graphics to create a cohesive message for the company. Canva is very popular because you can upload brand kits, but you can also do this in PicMonkey.
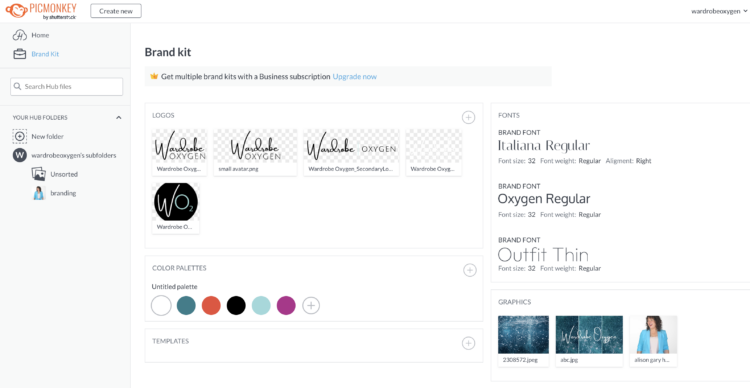
Since I hired a graphic designer a few years ago who created a brand kit in Canva, I have a minimal brand kit in PicMonkey. But as you see, I have uploaded my logos, the hex colors for my site colors, my headshot, the bubble graphics I use for backgrounds, and the primary fonts I use for graphics.
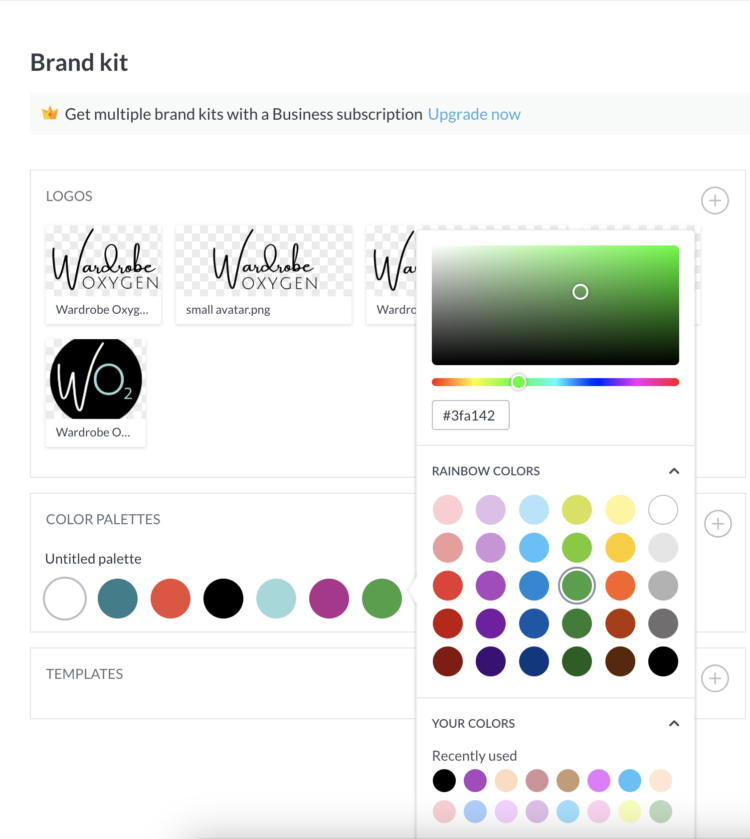
If you don't have specific hex numbers for your colors, there is a tool where you can play with the colors and create one you like or closely matches existing branding. By saving it in the brand kit, you can ensure you use the same exact color each time, and by any user of the account.
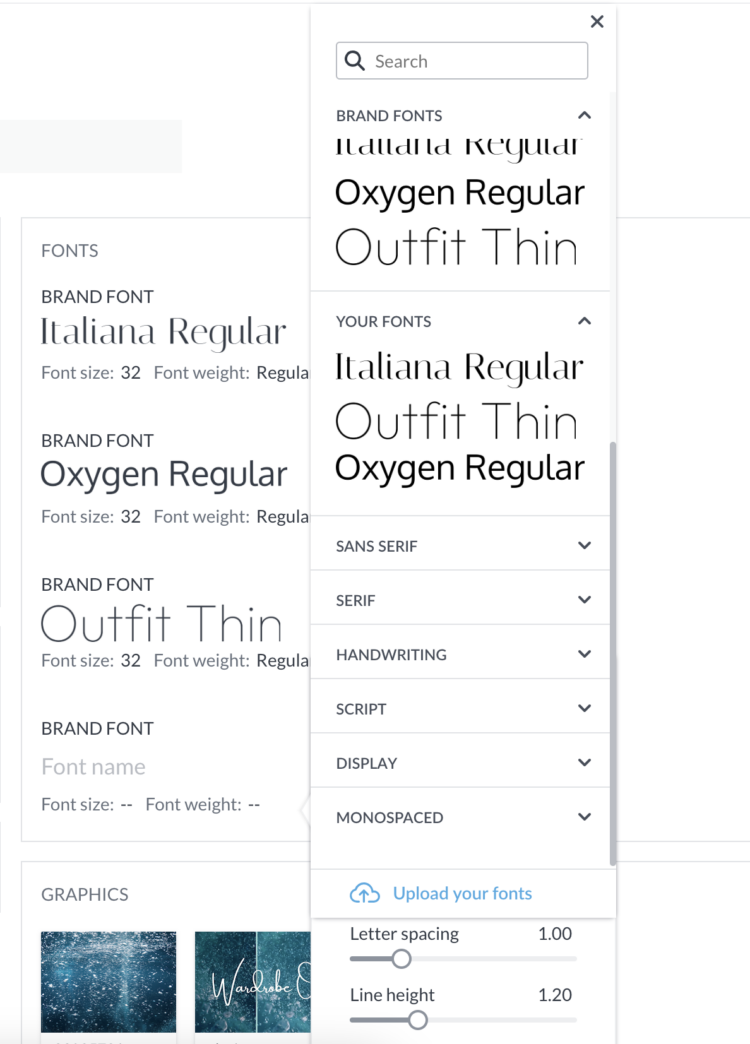
When it comes to brand fonts, you can choose from the dozens and dozens of fonts PicMonkey offers, or you can upload your own fonts. If you have a Brand kit, it likely specifies fonts and the spacing. If you only have those fonts on your computer or another graphic platform, you can often find them on Google Fonts or other sites you find when Googling, “free fonts for download.” Download them, and then click “Upload Your Own Fonts” on PicMonkey to retrieve them. They will be saved in your Brand kit for future usage as long as you have PicMonkey membership, even if the fonts are no longer saved on your machine.
How I Use PicMonkey in Everyday Life
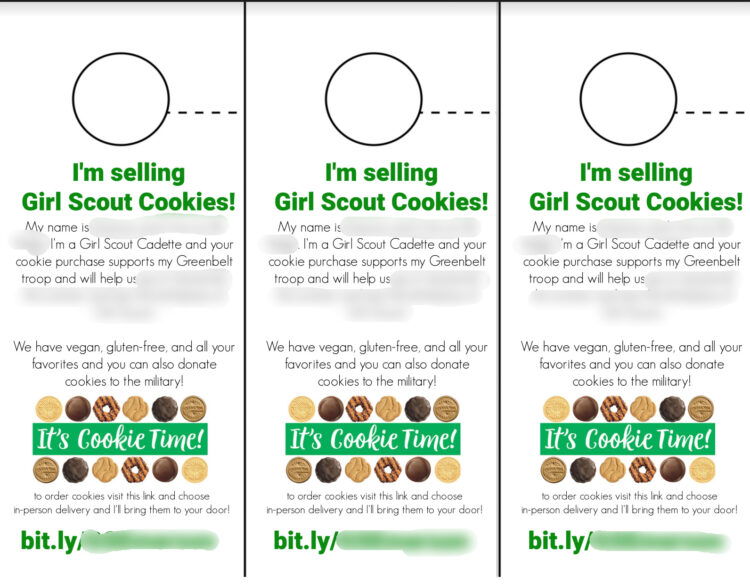
When I was a Girl Scout leader, I made our bridging certificates, recruiting flyers, and other paper products with PicMonkey templates. When I did social for a nonprofit, I used PicMonkey to craft Instagram and Facebook graphics. I've used PicMonkey to make personal joke birthday cards, to design our family holiday cards, to craft programs for a memorial service, to make flyers for a community potluck.
At my old job in Corporate America, I used my PicMonkey account to blur out pricing on screenshots for slide presentations. I would take team headshots and remove the background so experts could have their image overlayed on speaker series marketing. I also used PicMonkey at old jobs that didn't have a graphics department to create binder covers, name cards, flyers, and business card templates.
It's nice to have a skill like this in your back pocket, especially if you are involved in a small community that could benefit from marketing and promotion. Sign up with a communal email for your small group to share the same account. And know you can cancel PicMonkey at any time.
Why Not Canva?
Oh my dear, I of course also have Canva! A lot of my branded graphics are through Canva. Several years ago when I changed my logo, I worked with a designer who built me a branding kit in Canva with gorgeous unique templates just for my business. However, I don't find Canva nearly as intuitive, and it's not a great place for “photoshopping” images. Using both Canva and PicMonkey for years, I will still go to PicMonkey 90% of the time just because I think it's just easier and more enjoyable to use.
Canva has a functional free version, and I know most choose it for that fact. However, I suggest that if you are donating to a cause, maybe consider donating a PicMonkey membership and donating your time to understand it well enough to create items? It's a great way to become involved while also learning something new!
What Topic Should I Address Next?
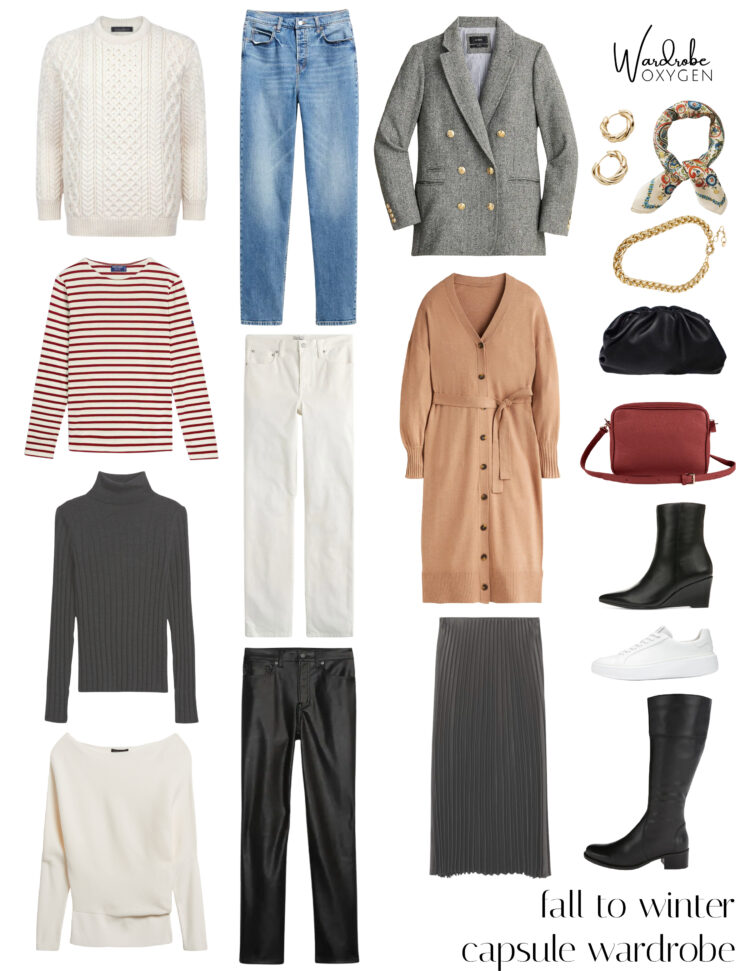
Those who are familiar with the content I make on Wardrobe Oxygen likely recognize the graphics in this post from this past late fall/winter. I originally wrote this post in 2022, but it sat in my drafts for months because I didn't think it made sense as content on a fashion blog.
But over the months I have seen more and more friends who are volunteering for organizations in their community, running for public office, and starting small businesses and need tools for marketing and graphics. I have also seen a lot of folks charging a lot of money for advice that I think should be in the public domain.
Style goes beyond one's wardrobe, and we all know that quality marketing makes a difference. I hope to empower grown women to achieve a stylish life on their terms, and that can be style in their jobs, their hobbies, their side hustles, and their communities. Everything I learned for this job is from researching it; I got the information for free and am happy to pass it on to empower others.
So let me know, what tool for an online life do you need or aren't sure how to use? Need advice on managing Meta? Looking for free tools to organize online documents, images, and other materials? Tips for more engagement on Instagram? Or maybe you're wondering how to protect your identity and stay safe on the internet. Let me know, I want to help, and your request may be the topic of my next Topps for an Online Life post!

Did you like what you just read?
Consider tapping here to buy me a coffee in thanks. The best gift you can give a content creator is the gift of sharing. Consider sharing this article on Facebook, Threads, or saving on Pinterest. Thank you so much for your support!
Want more posts like this? Add Wardrobe Oxygen as a Google Preferred Source.


I would love a post on posing for pics, particularly full-body shots. I struggle to find the angles and poses that look best for me (I’m short with curves) and most of the pics I pose for (esp group shots) end up with me looking stocky.
I love this info and will definitely be looking for more! Also, I think you had way too much fun with the Rock. 🙂 🙂 🙂
Thanks for all the info!!!
I would love to know how to take better pictures of my daily outfit, just to keep a record for myself for inspiration. Thanks for this series.
What a generous post! Thank you for sharing your knowledge. I have wanted to use Canva but don’t find it intuitive, so I might check PicMonkey out. I am curious if you would recommend your graphic designer. I am also a solopreneur but don’t have a public presence like you do. I should probably invest in graphic design for a logo (mostly for invoices / business cards / contratcs) and trying to decide whether to hire someone or start with the more moderately priced AI design tools out there